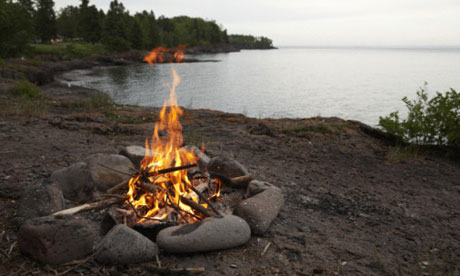
Making a campfire brings back so many memories – some sublime, others painful and a few instructive.
In the sublime category I remember a cold, clear morning in an Alaskan wood. I woke to the wonderful scent of spruce and started up my breakfast fire. I bundled snow in a clean sheet, which I hung downwind of the fire. Soon there was enough water in my pot for coffee. I warmed cured strips of salmon on the embers and toasted the oily salmon skins until they grew crisp. As I ate, legions of white hooper swans passed overhead in the perfect blue of the early spring sky.
So much for the sublime: now for a little pain. In an indulgent pre-child era my partner Juliet and I camped on a river island beside a deep, clear pool on the Isle of Mull. As darkness fell we sat beside a perfect little blaze. As the moon rose we lay back to watch the stars ... at which point I tipped the kettle from its flat stone beside the fire. Everything went suddenly dark. Worse, my right foot was soaked in scalding water. The next morning an orange boil the size of a tennis ball had appeared on my foot. Using a length of oak as a crutch, I began the long walk back to the car. Halfway, I stumbled and jabbed the stick into the burn. This time I had to scream – what's more, the stick had collected a nice coating of dung on the way.
I have made fires all over the world, and on the way I have picked up a few tricks. For serious cooking it can be useful to get two fires going: one for light and making charcoals and the other for cooking. First start up your feeder fire and then shovel charcoals from this into your cooking fire pit. You can keep topping up your cooking fire with embers from the other.
A few years ago in the wilds of northern Spain a weather-beaten shepherd looked on with amused contempt as I made my fire. I stood up. "OK then, you do it," I gestured.
Then I stood back to watch a master at work. With deft economy he first gouged a Y-shaped trough in the ground, then placed three flat stones on each triangle of the Y. He gathered a few twigs and placed them in the centre of the Y shape and lit them. He then put the frying pan on the stones. It worked perfectly. The Y shape allows plenty of air into the fire but the trench stops it being blown away. All that is needed are a few twigs, or one length of wood, which gradually feeds in along the "trunk" of the Y.
I often use lengths of green wood for skewering meat, fish or vegetables and cooking them over charcoals. Be careful to choose the right wood though – hazel is ideal, but when abroad be careful to ensure your chosen wood is not poisonous.
A common mistake is to start when the fire is too hot. If you can hold your hand about six inches over the fire for 10 seconds or so it is ready to cook over. It's best to grill meat on a bed of charcoals. A twig fire is good enough to boil water, but avoid flame for cooking.
Also, I always try to cook everything up using one big frying pan and always have a good kettle and billycan handy. Don't bother with knives and forks – it can all be done with a spoon. A good trick with vegetables is to skewer them on wire and then hang the wire over the fire.
Finally, if the fire is still strong at bedtime, bury it. The earth will keep the fire smouldering, so that next morning you simply push the top layer off, put some kindling on the coals and in no time the breakfast fire will be crackling.
In all of us, there remains that ancient fascination with fire. And who knows – in these days of rising fuel costs the ability to light a fire may once again become a vital life skill.

